Prototype modelling

So I spent the day making my model, I’m not that happy with it at the moment and I will improve on it, but by making the models it will give me a better understanding of the shape and function in certain aspects, I made it out of model board and plastic, it’s build up of four separate pieces, I really like the shape of it and I think it would look amazing in aluminium.

20140321-020538 pm.jpg

20140321-020553 pm.jpg

the city project; field group; experimenting with shapes

so this week we started making little pieces and experimenting with shapes and different materials, we are looking for the best way to display the underground city in the tank, here is what we made,

photo

here are the ones we made from, cardboard, and blue foam, we also made some from clay which in my opinion, and the others in the group, had the best outcome from them all, however im going to make some from wood/MDF, the clay worked so well because you can mould it perfectly to what you want and it will also be easy to hid and se at the same time, the foam works well because its simple to form shape from, however its pretty weak and wont hold much weight and its blue which wont look very nice surrounded by mud.

the city project; initial sketches

IMG_2710IMG_2707IMG_2708IMG_2709IMG_2706

here are some of my initial ideas for designs, I’ve kept to making my ideas look abit futuristic, however im also trying to keep my ideas close to the present days because in my opinion the tragic state of bike storage in cities across the world needs to be sorted out now. I quite like the idea o the Red drawing because its compact, and can be made from cheap metals or plastic, however I find the design so far abit to bland and not exciting enough so I need to work out what I can do to make this more appealing and more interesting for the users of this product.

20140306-061615 pm.jpg

20140306-061647 pm.jpg

20140306-061714 pm.jpg

20140306-061740 pm.jpg

20140306-061806 pm.jpg

20140306-061838 pm.jpg

20140306-061857 pm.jpg

the city project; target market

it was hard to pick a target market as my product is accessible for anyone, however I have chosen a large range of people in the community by doing this I can add more features to my product so it is compatible with my target market, the criteria of people who I want to be catering for is office or business workers who work in the city centre, they are between the ages of 25-50 , I think this is a good age to cater for because they will be able to afford some sort of paying tariff that I want to apply to my product, however its available for anyone to use and available for both genders.

I chose office and business workers especially because of this article I found, and by reading this article I understood what the problem was for them and found a solution,

bb

I think this article explains how big the problem is and how big of an opportunity it is to design a product that will make peoples lives much better,

the city project ; exsiting products

so my idea is to improve the quality of bike storage and safety within the city, this means im going to look into existing products and build on them,

“the bike hanger”

Manifesto-Architecture-Bike-Hanger-Souce-IM

this is a wonderful piece of design, in Korea’s capital city Seoul, I really like the idea however its far to large to have in a city centre also it doesn’t store enough bikes, so on a whole it doesn’t really solve the bike storage problem very good.

this is the “cyclepod”

Sainsburys-640x440

this is an effective way of bike storage, and it has a shelter, however its very very low on security which means people will see this as an opportunity to maybe commit theft or vandalism on the locked up bikes which isn’t ideal as many cyclists have high spec and expensive bikes, the other problem I see with this product is that its very unaesthetically pleasing to look at, and if it was placed in a city centre it would create a horrible eye sore. so as an conclusion I find this product effective but unsecure and ugly.

this is the “S.W.O.P bicycle box”

VC13_CS_SWOP-01

I really like this idea and its relevant to my idea, I like the fact its really secure and safe, I think the design could be abit more nicer, in terms of colours and the shape im not to keen on however this will help me get my design perfect.

this is why I chose the bike storage problem, because it is in such high demand and councils in the uk especialy aren’t splashing out for them, http://www.sustainablevalues.net/in-cities-bike-storage-is-a-matter-of-life-and-death/


Project 3: Final design, models

We put all of our ideas through another matrix and came out with one final design that we all agreed was good, which is the oil dispenser idea, and we added to the idea that we should make a whole set of condiments for aiding cooking how ever each one will only let out a certain amount of each to restrict overuse of the substance.
Here are the models I made of the design we came out with,
1:

20131105-114736 pm.jpg

20131105-114751 pm.jpg
I like this Idea however there isn’t enough holders for what we need and we discovered it was to hard to hold.
2:

20131105-114924 pm.jpg

20131105-114943 pm.jpg
I like this design more as it’s easier for the user to hold, more economic, also it has 4 segments so can hold more such as herbs and the oil just slides in the middle

modeling of my object

so this week I started to model my product, to do this I’ve been using various measurements for blue foam. I think the foam is really nice to work with as its easy to slice and shape with hot wires, sanders and files this means I can make a exact replica of my existing object, I have spent all my other time observing my object to fully understand every last detail so I can transfer them on to my model, I think that it is very important that I make a model because it will help me fully understand the importance of each and every  detail that  designer has used to construct an object such as mine, so what im trying to do is put my self in the designers shoes and completely understand ever aspect.

dddddddddddddddddddddddddddddddddddddd imageddddddddddddd

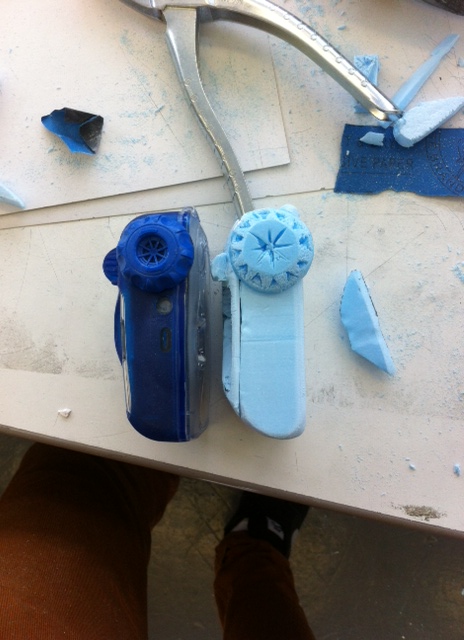
here is my first attempt of modelling with blue foam as you can see its very rough, for this model I decided to make the rubber web on the front separately from the camera part this was to make it easier for my to shape it however this wasn’t the case and it made it twice as hard as the scalpel was not shape enough so my cuts were very jiggered and when I went to sand it down to make it smooth it became to thin and kept snapping, it took me three attempts at the web to finally make one that actually stayed together. I think it does look like my object however some of the measurements were completely off and made my object look odd, however it did still look like it. I think the shaping on the rest of the object was similar and when I held it it felt the same as the object apart from it was lighter.

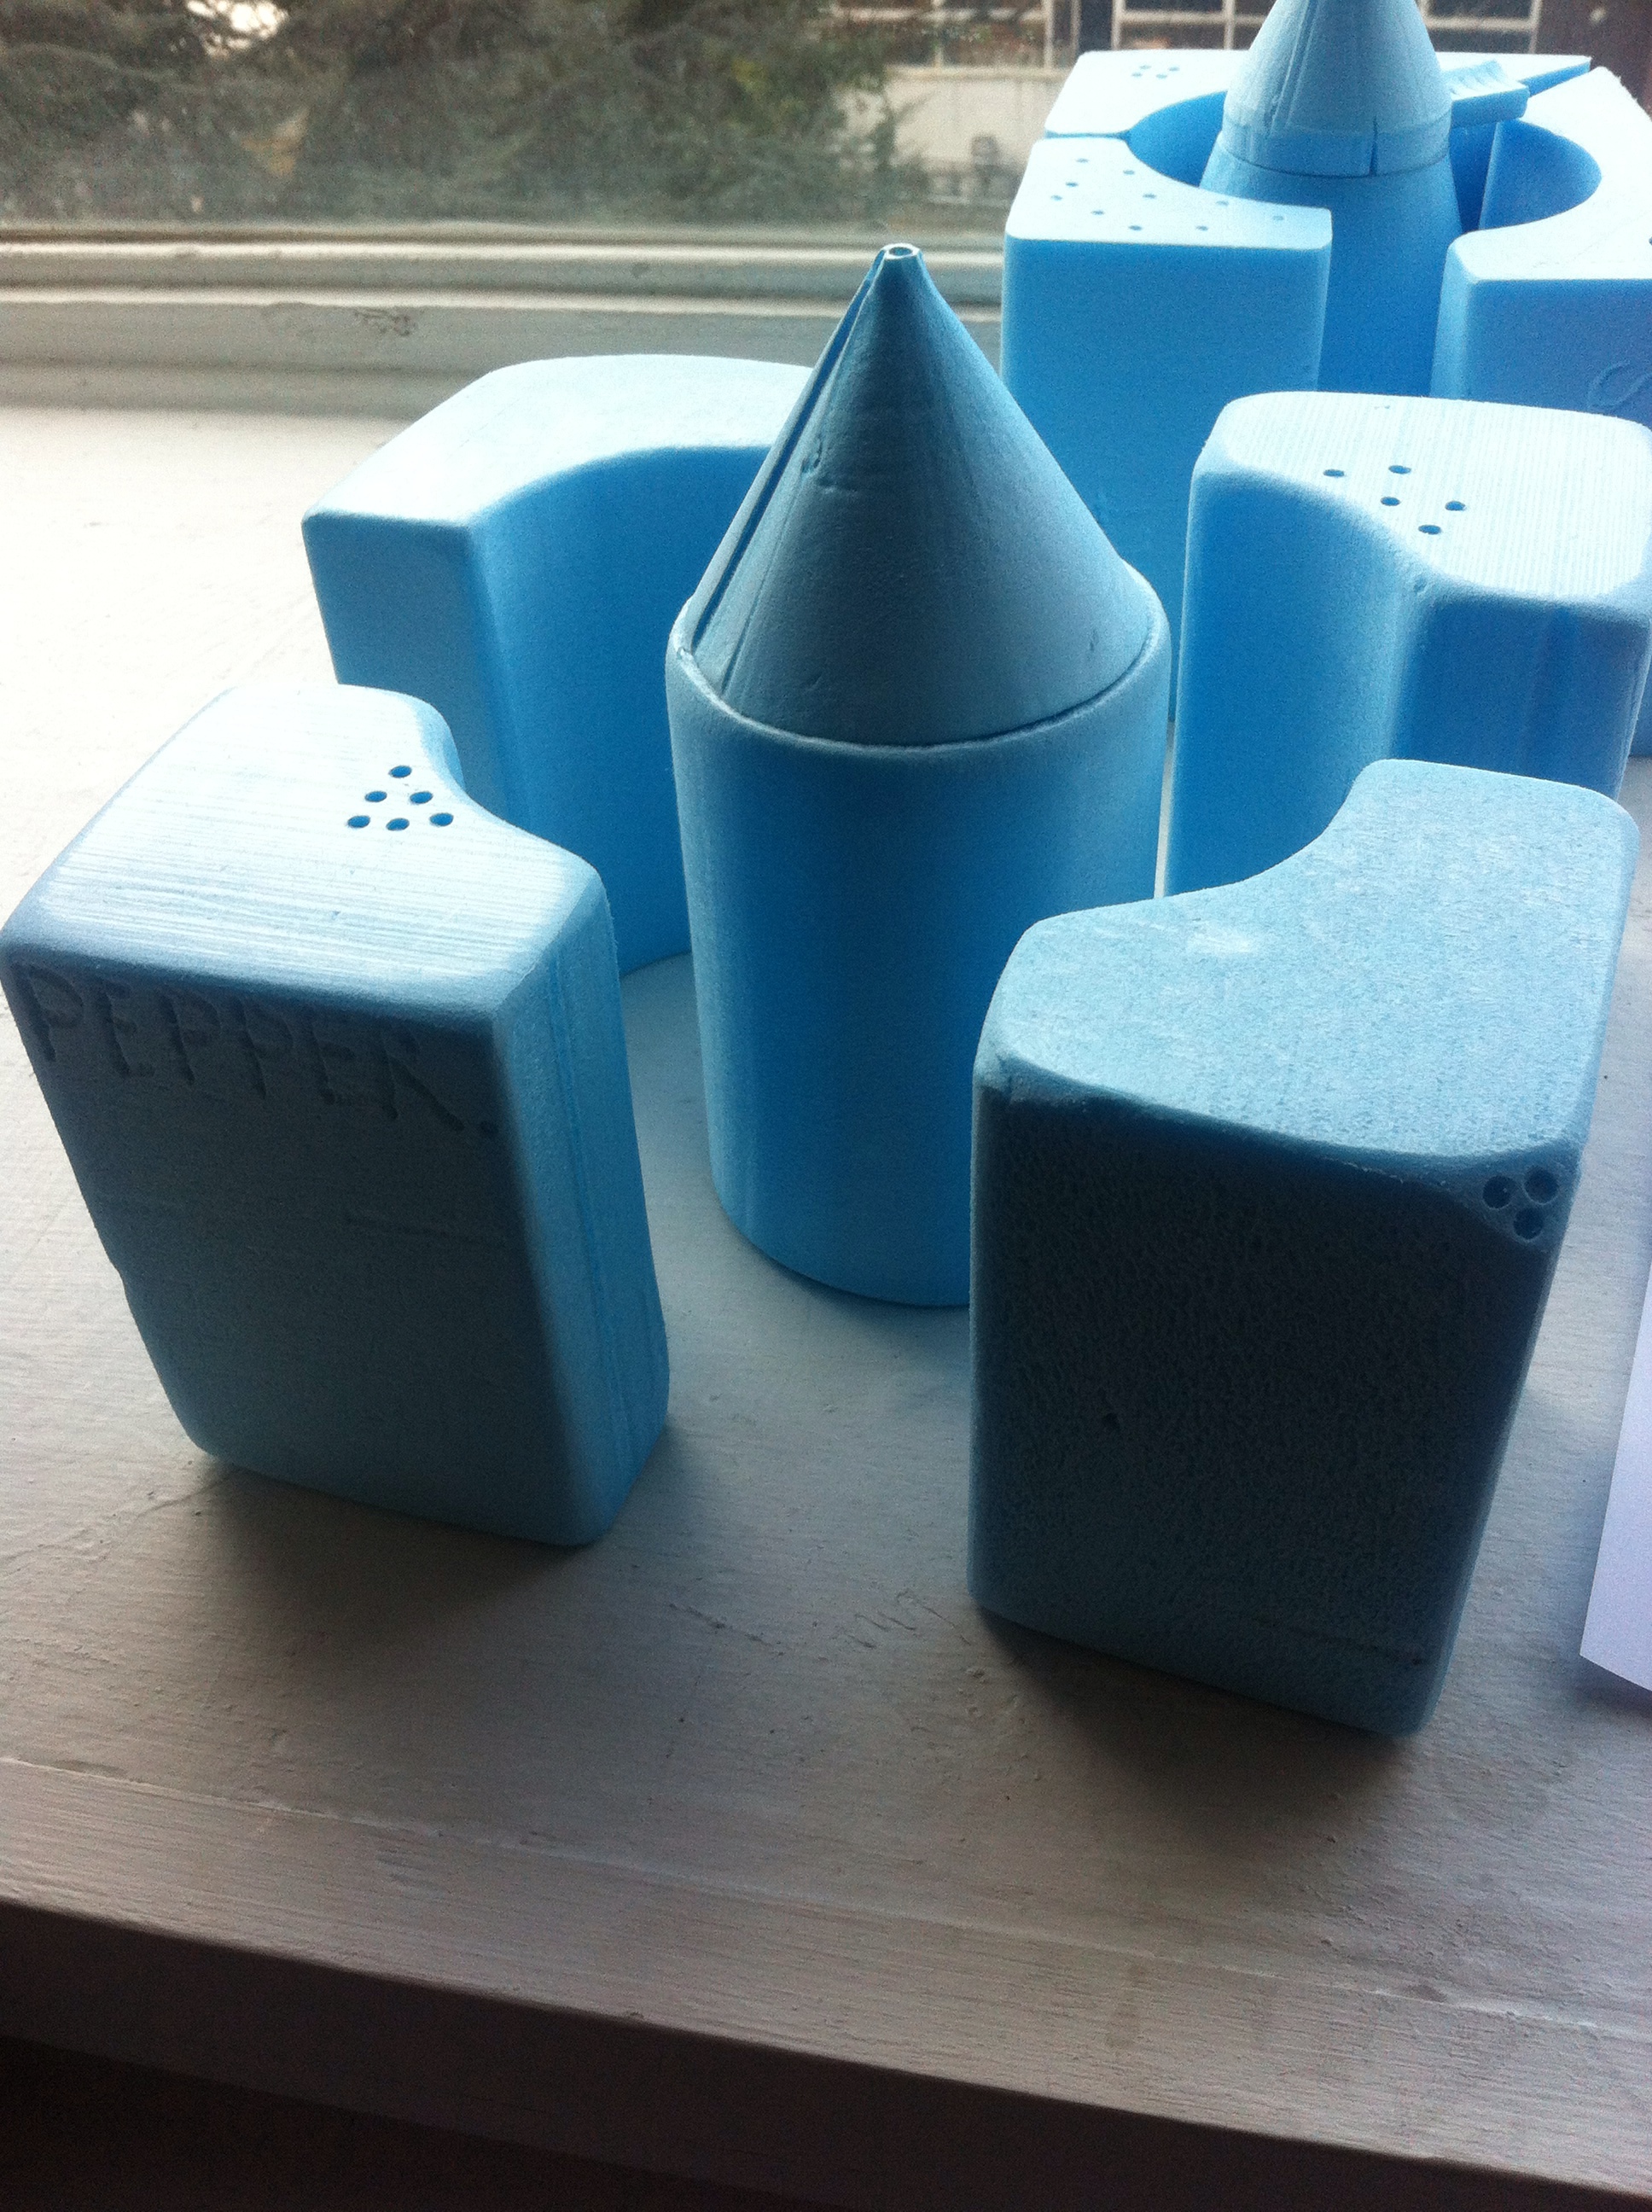
for my second model I used a different technique to carry out the shaping of my model, this time I made it in two parts again however this time I just carved the rubber web on the front into the block of foam using files and sandpaper I also made sure all my measurement were correct.

image6k6k6k imagejj

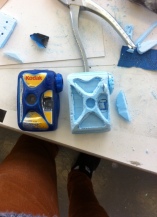
as you can se from the picture there is white parts in my model, that’s plaster, I used the plaster to make the curves in the web smoother, this is a great technique to use because it actually enhances the look of the three dimensional web, after applying the plaster I smoothed it with sand paper and files the out come is very pleasing and Im happy with the shape, after i made the front I measured out a slice of foam to fit on the back of the model because the actual object has this component too (as im trying t make it as realistic as I can) I used glue to attach the component to my model.
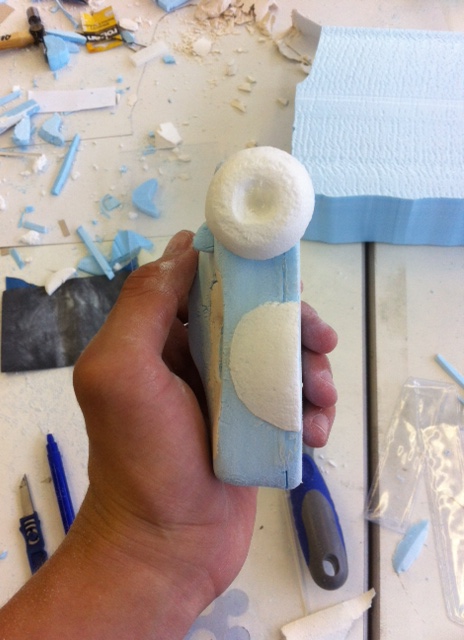
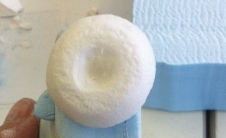
next I started to add all the little details from my object into my model I started by making the click wheel to stick on the top, for this I just sliced a small foam ball into two nd shaped one half into a circular shape using files and sandpaper. using the same technique I made the small ridged area that goes on the top of the camera I think the part is purely for aesthetically appearance that an functional reason.

New Image New Imagefgg

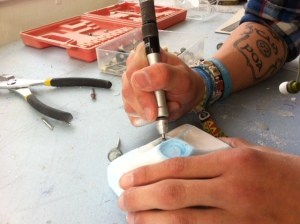
the last detailing I did on my second model was the lens hole and the sight holes, for this I used a different tool that acts like a little sander, its very easy to use and is held like a pen so you can add the finest detailing with multiple bits for it. after experiencing how useful this tool was I realised I could of used this to shape all the curves into the web on the front of the camera, but I can just use it on my next model.

7777 777766